
How to Save Squash Seeds | UNCOVER GARDENER’S GOLD
Focusing on saving seeds is a yearly goal in my garden in order to produce the best vegetables for my family. Having a small garden makes you hype aware that every decision is important for that square foot available to grow.
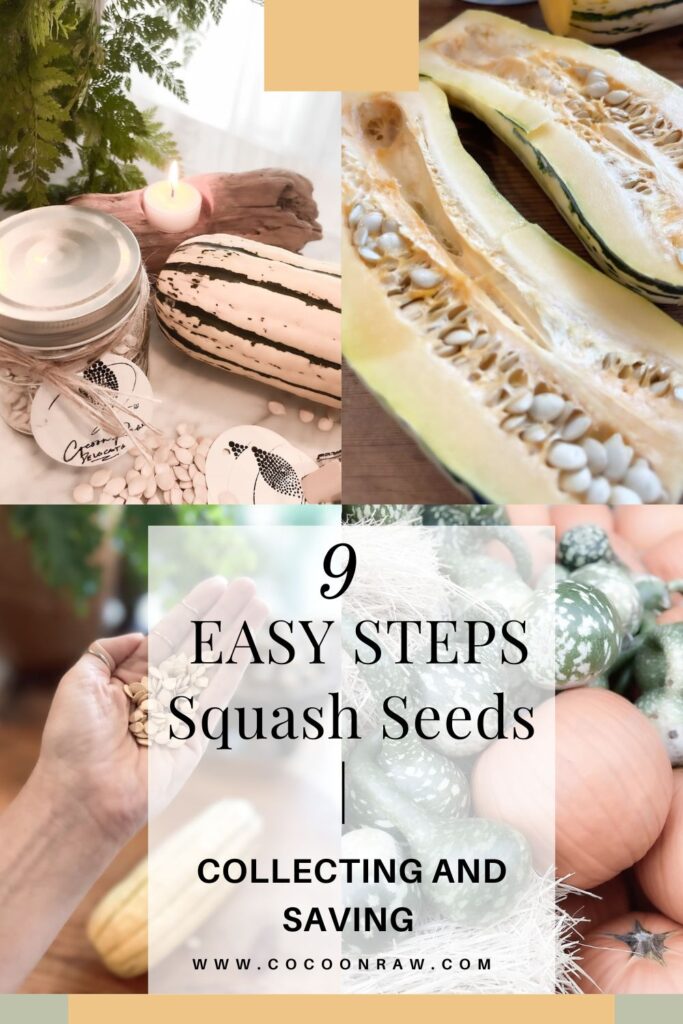
You can save squash seeds, generally, you must select the ripe squash, harvest the seeds by spooning them out, process them by washing them with water to remove pulp, and dry them on a paper towel until fully dry (7-30 days), and store them in a plastic container or paper envelope.
Links in this article are affiliate links and if you click on them, we will receive a small commission at no additional cost to you! Clicking and purchasing help to support this blog and all of the home and garden posts we bring to you! Click here for full disclosure
FIRST STEP TO SUSTAINABLE URBAN GARDENING
Are you ready to explore the world of squash?
I was not a big fan until I tasted my first delicata squash.
I will show you how simple it is for you to begin adding your own harvested seeds from your garden. The extra step will provide you with delicious squash for the summer.
We will also go over the different squash varieties you may want to consider for your garden.
Remember that every step is worthwhile to enjoy a fruitful gardening experience.
CAN I PLANT SQUASH SEEDS STRAIGHT FROM THE SQUASH?
The question of whether you can plant squash seeds right out of the squash is easily answered because it is always possible, but there is a better way to make sure you will get a higher germination rate.
The best practice is to harvest the seeds from the squash, process them by washing them, removing any pulp, and finally drying them.
Seeds always want to grow, that is what the plant is always trying to do, keep procreating. But the best quality fruit generally comes by you taking the time to process and select the best seeds.
HOW DO YOU SAVE SUMMER SQUASH SEEDS TO PLANT NEXT YEAR?
Harvest the fruit, remove the seeds and separate from the pulp, rinse with water, and dry.
Step-by-Step Process to Collect Squash Seeds
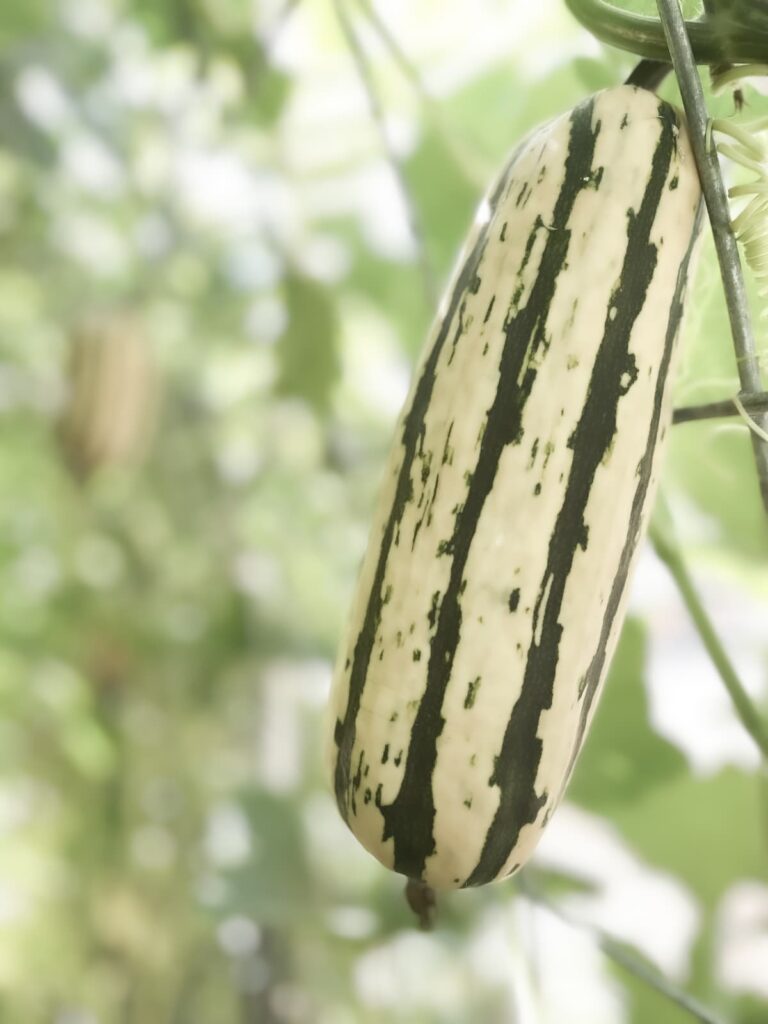
- SELECTING SQUASH WHEN READY
The most important step to take is to make sure you are selecting a squash that is ripe and ready. If you select your squash that is not ripe, it will be very wet in the center and the seeds will not be ready.
One of the best ways to know if they are ready is:
- Tap on the fruit and it will sound hollow. If the tap is not hollow it means that it is full of the wet pulp in the middle and not seeds.
- Another way to know if it is ready will be that when you place your fingernail on the skin, it will peel off easily. The squash is drying on the core and the outside skin.
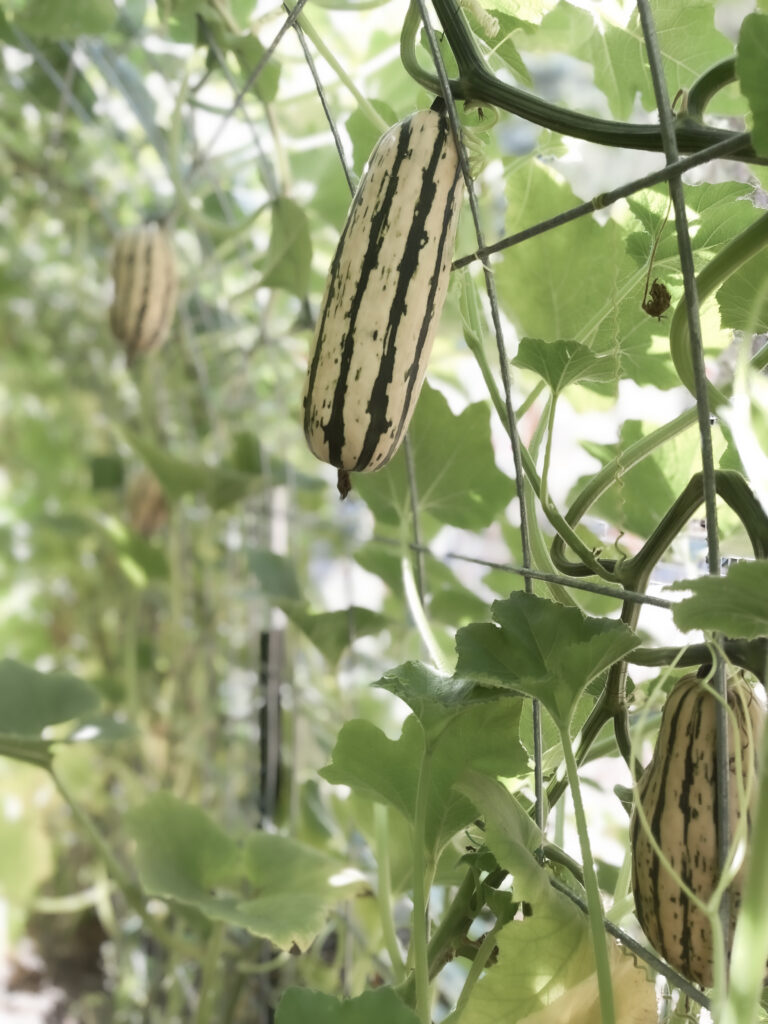
2. HARVEST THE SQUASH
The squash will fall off the vine very easily when ready to harvest. If you have to pull, wait until is ready.
3. CUT THE FRUIT
With a knife, carefully cut the fruit the long way. Take your time, the flesh is hard, so it is a little difficult to cut in half.
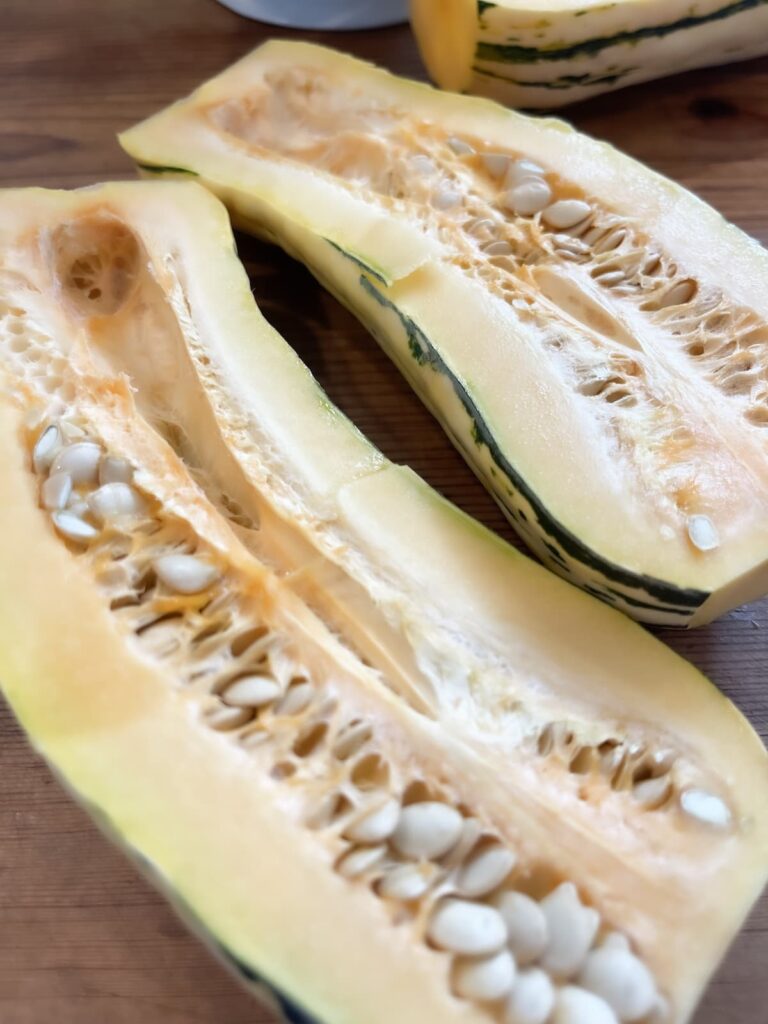
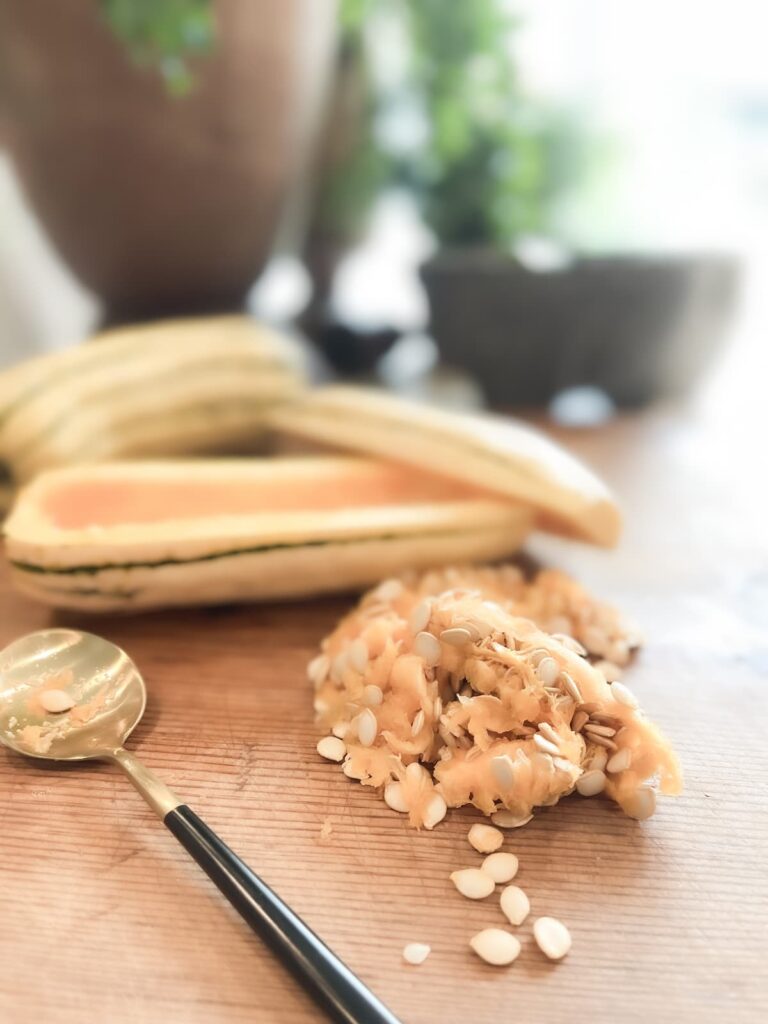
4. HARVEST THE SEEDS
Now that the squash is open, use either your fingers or a large spoon to remove all the seeds. Notice how the seeds come right out with the pulp, it should not be hard to remove them. The seeds are pretty dry, unlike tomato seeds.
Remove as much as you can of the pulp and place the seeds on the colander.

5. PLACE IN A COLANDER TO PREPARE FOR CLEANING THE SEEDS.

Step-by-Step Process to Clean Squash Seeds
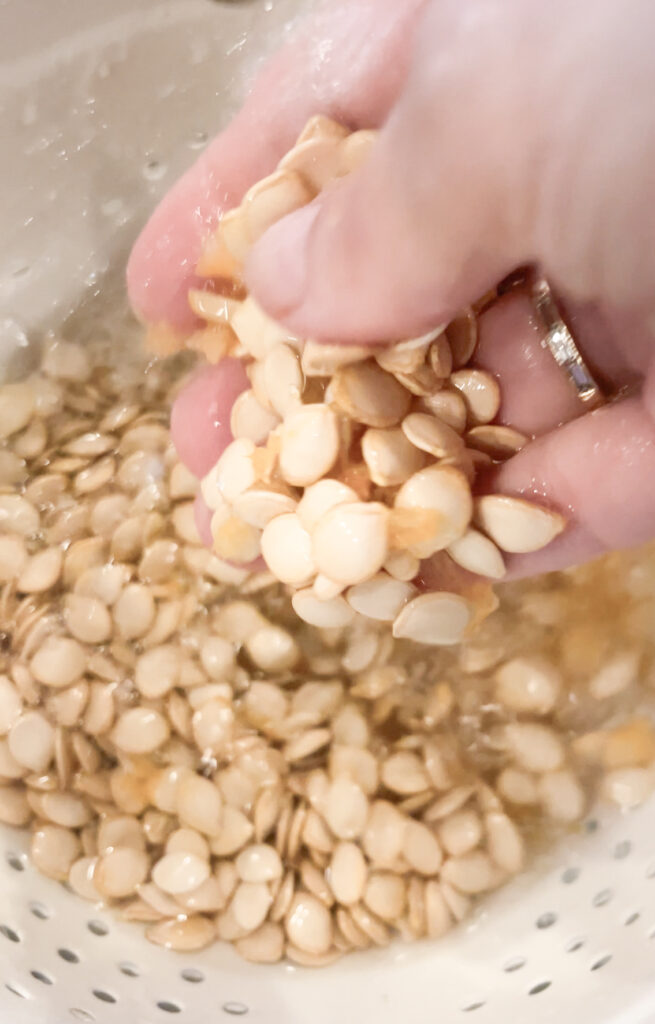
5. CLEAN THE SQUASH SEEDS
Rinse the seeds with cold water and move them around until you don’t feel the slime in the water.

6. REMOVE SQUASH PULP
When you are rinsing the seeds, remove what you can of the rest of the pulp with your fingers or a large spoon that has holes in it. I prefer using my fingers the best, the pulp comes out easily.
Don’t worry too much if some of the pulp is still on it. When it dries, it will shrink and be easier to remove.
I don’t ferment the seeds like tomato seeds. If the squash is ready, the pulp will come right off if you wash it thoroughly. Some believe that the seeds won’t have as high a germination rate, but it has not been my experiece. I prefer to make my gardening life easy and clean the seeds throroughly.
If you are concerned about this then you can use the same process that is used for fermenting tomato seeds.
Step-by-Step Process to Dry Squash Seeds
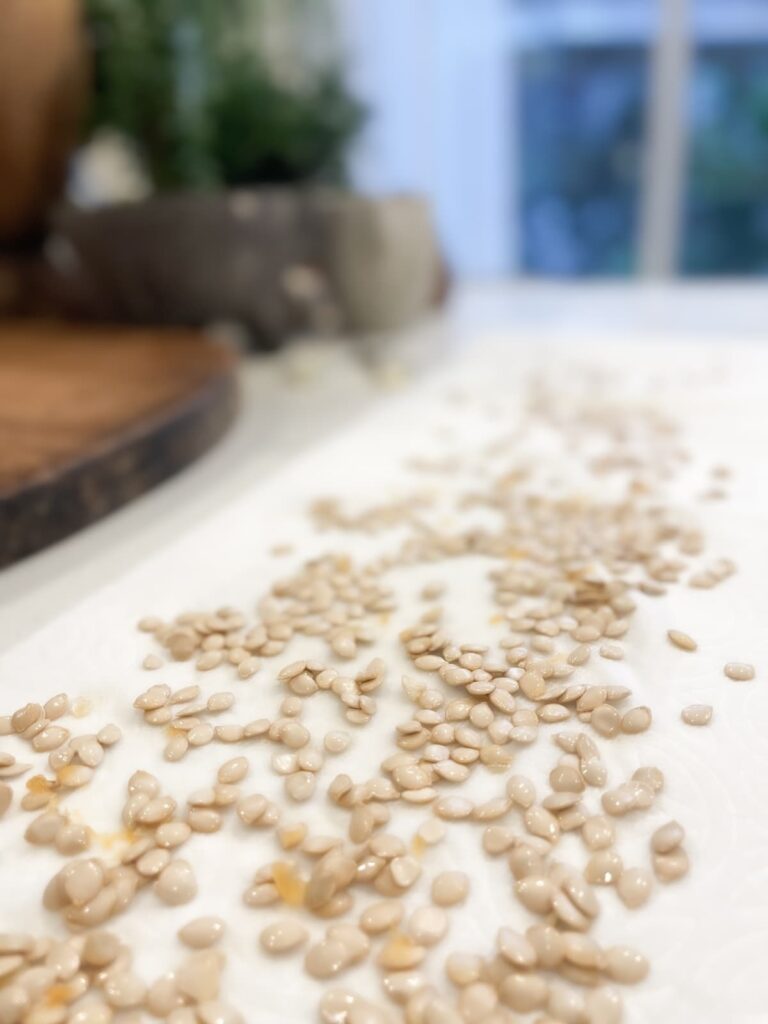
7. PLACE SQUASH SEEDS ON PAPER TOWEL
Use a paper towel to lay your seeds in one layer. Allow them to dry on the paper towel for 24 -48 hours.
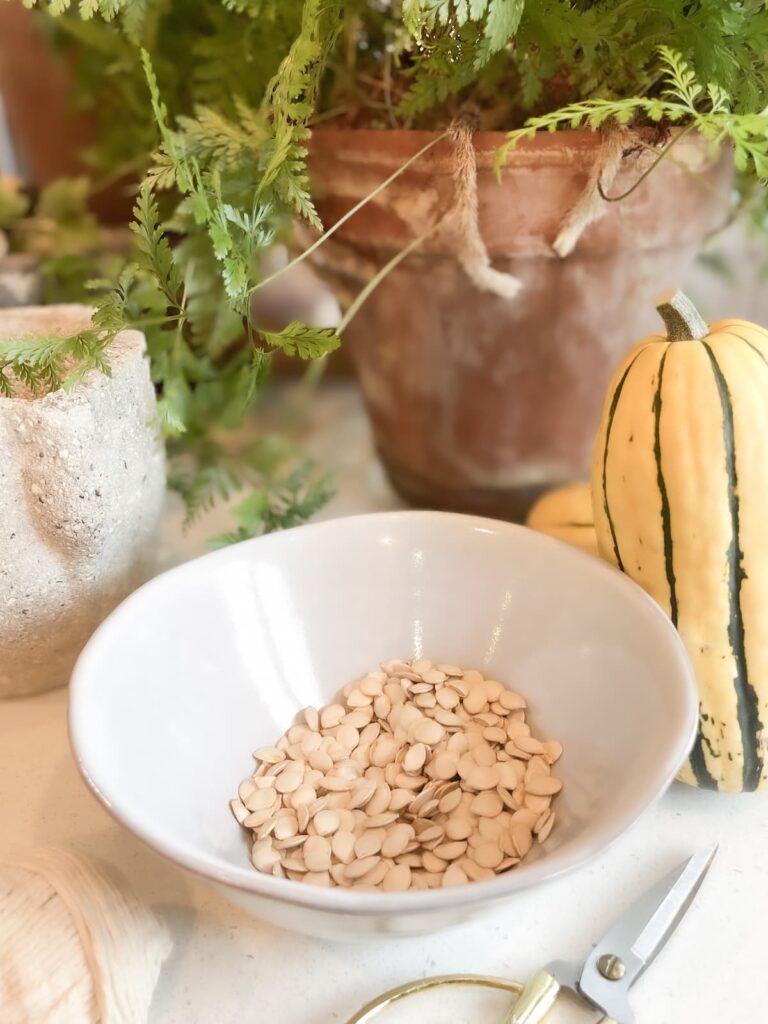
8. PLACE SEEDS IN A BOWL
Once they are pretty dry, place them in a bowl for the next 3 – 4 weeks. I reach in and move them around every few days to allow for air flow.
The length of time to dry depends on how humid your home is. I live in a very humid zone and allow mine to dry for a month.
Another option to dry them and not have to move them around is to use a drying screen. You do not need one unless you are drying a large amount of seeds. I have used a small window screen to dry my seeds or a soil sifter.
SOIL SIFTER
You can use this to allow your seeds to dry so it may allow air to flow around the seeds. This may expedite the process some, but timing is dependent on the humidity level in your zone.
Paper towel has worked for me. You just need to make sure that the seeds are very clean and give them the time they need to dry out.

9. STORE SQUASH SEEDS
Store the squash seeds in a seed paper envelope or plastic container. But make sure the seeds are very dry if using a plastic container or glass jars since it won’t allow the humidity to escape.

SEED STORING IDEAS!

SHOULD YOU SAVE SQUASH SEEDS?
A garden produces so much waste and in a small garden, waste can take over the little space you need to grow what you want.
Saving seeds is one of the best practices to benefit the quality of what you grow, and the most important choice you can make.
- Adapting Your Vegetables: When you save the best seeds, you are getting the seeds that are acclimating to the soil and climate you are in. You will have the most delicious vegetables and fewer battles with pests.
- Savings in the Garden: Reusing the seeds is the best way to reduce the costs of buying new seeds for a new season each year.
TYPES OF SQUASH
| SQUASH TYPE | PEAK SEASON TO HARVEST | GROWING DIFFICULTY RATING |
|---|---|---|
| Zucchini | Summer | Easy |
| Butternut Squash | Fall and Winter | Easy |
| Acorn Squash | Fall | Moderate (will be impacted by pests and diseases easier) |
| Spaghetti Squash | Fall | Easy |
| Delicata Squash | Late summer through early winter | Easy |
| Yellow Crookneck | Summer | Easy |
*This table above is a quick overview of the different squash types you can start with for each season. The table will help you select the right squash to grow in your small garden.

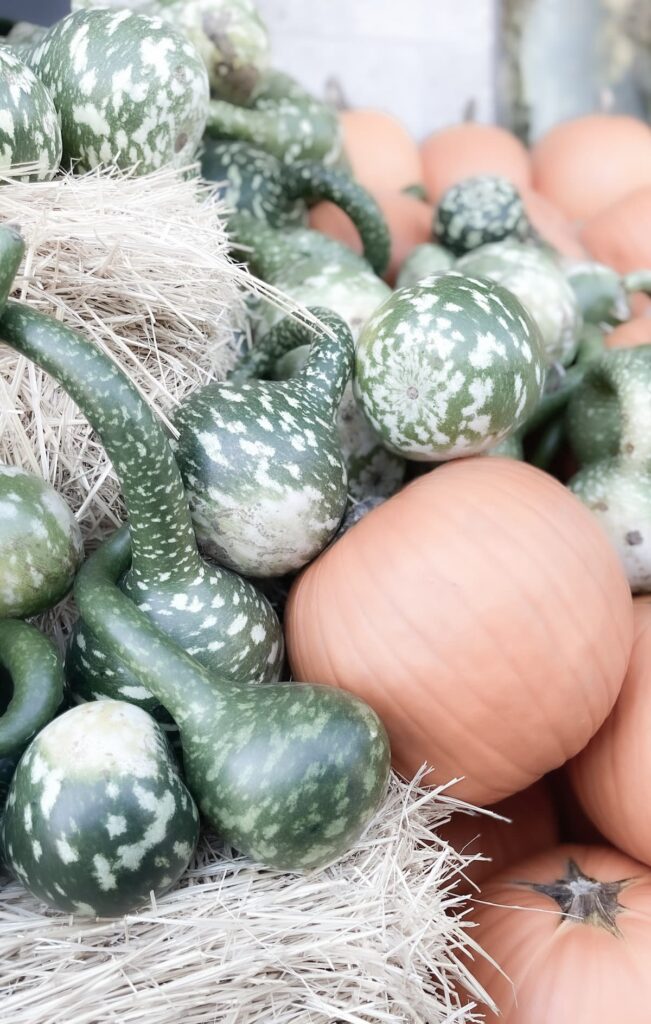
SO MANY TO EXPLORE – GOURDS!
Keep exploring the world of vegetables.
Gourds are also a fun vegetable to grow and save seeds from. Gourds are mainly grown for decoration, and this beautiful vegetable is so wanted in the garden.
A beautiful one is the long handle dipper gourd, the color, and shape make it such a beautiful one to grow and save seeds from. Squashes and gourds are extremely fun to grow.
You Cocoon Awaits You,
Stay Creative!
IF YOU ENJOYED THE POST, PLEASE PIN BELOW!
DON’T LEAVE YET!
Impact of Gardening on Mental Health


Love this!
Thank you Carol!