
PLANNING A GARDEN Layout: One Strategy Anywhere
Gardening rules are great… until they get in the way of what works in your garden planning layout. I’m the kind of gardener who sees open space and thinks, “That spot could grow more peas or maybe a handful of violas.” I don’t always follow the standard spacing guides or textbook-perfect diagrams. What I do follow is what I’ve learned from my small-space garden: when you layer with intention and plant densely, you can harvest more beauty and food than you ever thought possible.
This smart and easy strategy is a twist on traditional garden planning – it’s meant for people like me (and maybe you) who love to break the rules just a little in the name of abundance.
Links in this article are affiliate links and if you click on them, we will receive a small commission at no additional cost to you! Clicking and purchasing helps to support this blog and all of the home and garden posts we bring to you! Click here for full disclosure
When Should You Start Planning Your Spring Garden?
Start your garden planning layout for your spring garden, late winter or early spring, ideally 8-10 weeks before your last frost date. This gives you time:
- Sketch out your layout: Take a look at the Garden Goals Yearly Planner; it is so helpful in getting you to sketch on paper or digitally. Easy to grab when you feel the inspiration and start doodling to create that amazing dreamy space.
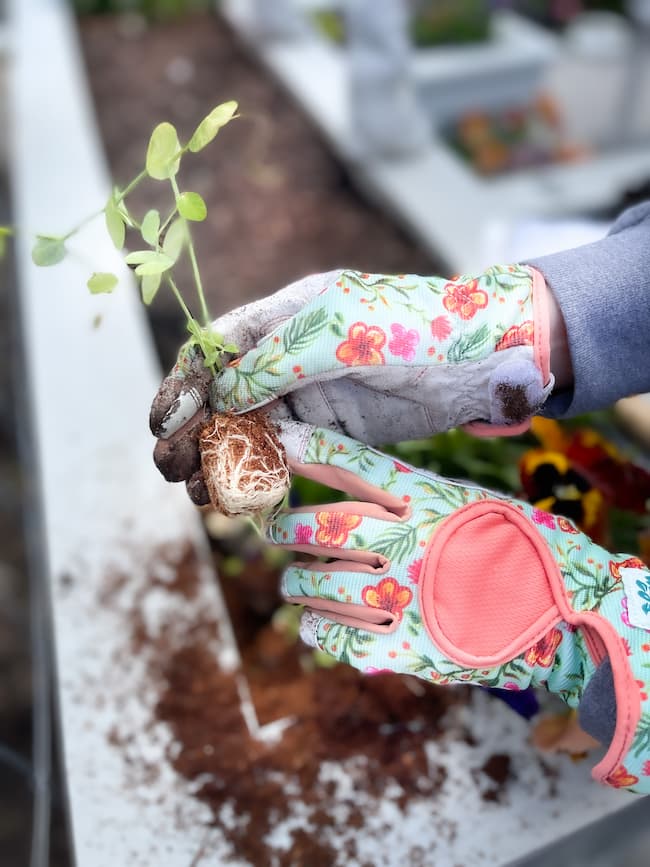
- Order seeds or pick up starter plants: I like to save money and grow a lot of my seedlings. Plus, it is so much fun to see them grow and take care of them when the garden is asleep.
- Prep your soil and containers: I wait until the rain has stopped some so I don’t waste nutrients by them washing away.
- Set up any trellises or supports: Early on is a good time to check all the structures and provide any extra support or move them to a better place. I have plans for 3 of mine, they are going to a new spot that will be perfect!
If you’re in a warmer zone, this might be as early as January or February. Cooler zones might start planning in March or early April. Don’t wait until it’s time to plant. Having a plan early will let you plant with confidence and intention.
The Strategy: Layering for Abundance in Small Spaces
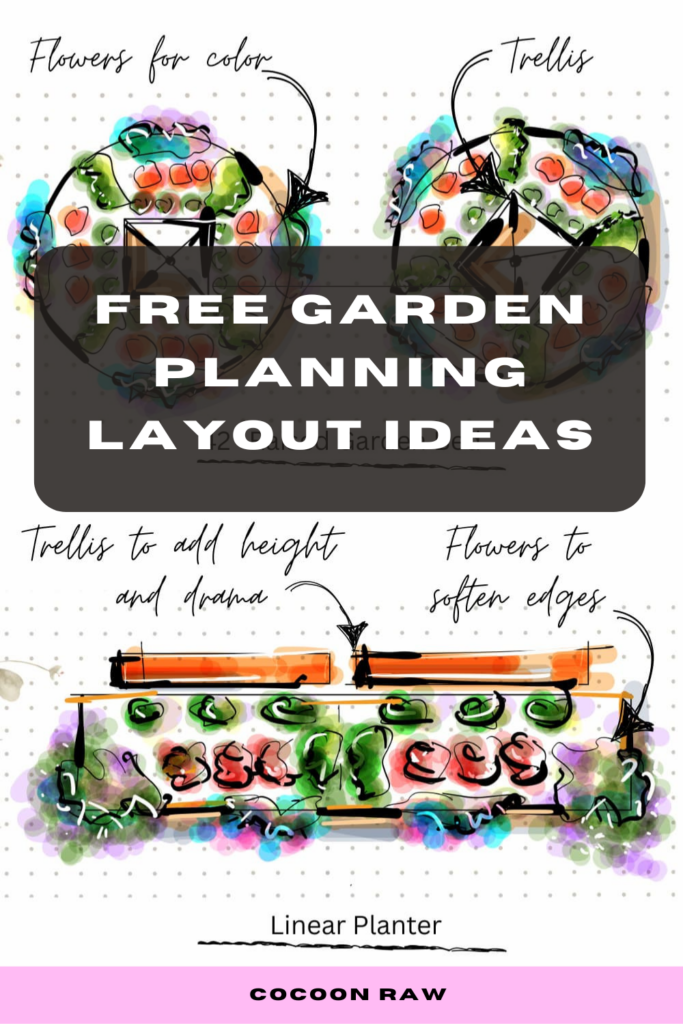
Whether you’re planting a round garden bed, a planter, or a container on your patio, the principles stay the same when working on your garden planning layout:
Start Tall, build down, and fill every space with purpose.
It’s about layering vertical, mid-height, and trailing plants so your garden becomes both productive and visually cozy. Not cluttered, but instead just full of life.
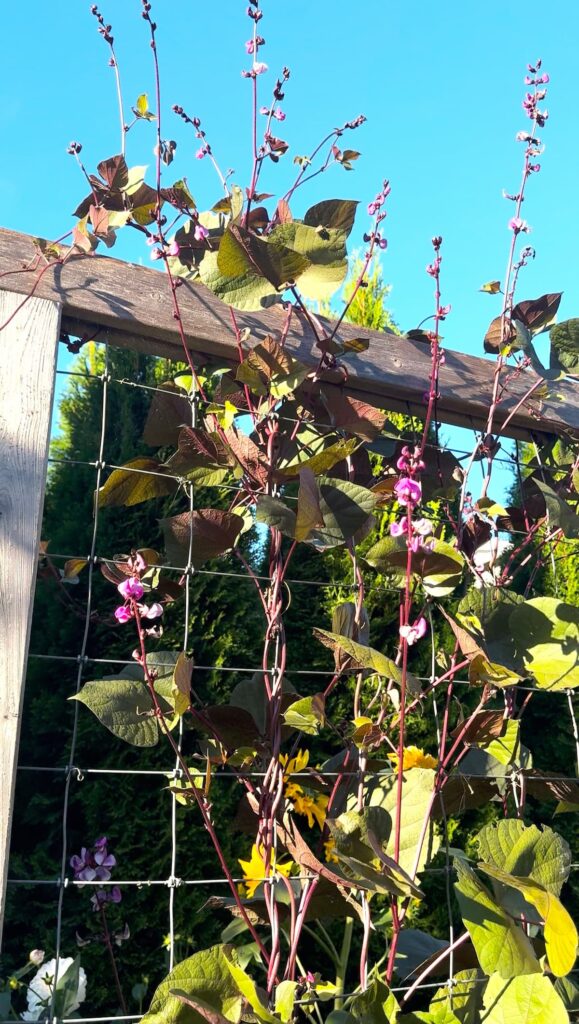
- Start With Your Climbers: Choose a central trellis or back row and go vertical with crops like peas, beans, or flowering vines. This pulls the eye upward and anchors the space. In my garden, I often use the center of a round bed for peas, letting them climb a teepee-style trellis.
Pro Tip: Even a tomato cage or repurposed wire frame can become a structure that brings your space to life.
- Layer with Mid-Sized Edible: Next, I surround my climbers with lettuces, herbs, or bush beans. These are your workhorse plants – reliable, productive, and easy to tuck into any layout.
I like to use red and green varieties of lettuce to create a rhythm and pop of color. The visual variety makes it feel more like a living painting than just a veggie patch. Check out my blog post about using color in the garden to create the most beautiful, cozy space and delicious harvests.
- Fill the Gaps With Beauty: This is where the magic happens. Most people stop here, but I like to tuck in violas, pansies, or even ranunculus. You can even add snapdragons horizontally to have them cascade down the edges. What a dreamy look! These soften the borders, attract pollinators, and make your bed look full, not sparse.
Yes, I know some would say I plant too close together. But if I see open soil, I can’t help but want to fill it, and it helps keep the weeds away. And that instinct has brought me more harvests and beauty than following the spacing on a seed packet ever did.


Why This Strategy Works? (Even If It Breaks Some Rules)
This method, when doing your garden planning layout, may not be for everyone. If you’re a gardener who wants neat rows and wide spacing, that’s fine.
But for those of us working with limited space-whether a 4×4 raised bed or a long container on a sunny balcony layered approach gives you:
- More harvests per square foot.
- Better weed suppression
- Improved soil moisture retention
- A garden that looks alive from day one
I often get comments about how lush my beds look-and it’s not because I planted less. It’s because I planted smart and close. As cozy and close as I love my garden life.
My small garden is planned to bring me joy, from what I plan to plant to how I will treat my experiences in the garden daily. If you want to learn more about my 15-minute ritual that changes the way I experience the garden, read ‘Small Garden Peace | 3 Truths That Actually Work’.
How To Use This Strategy In Any Garden Space?
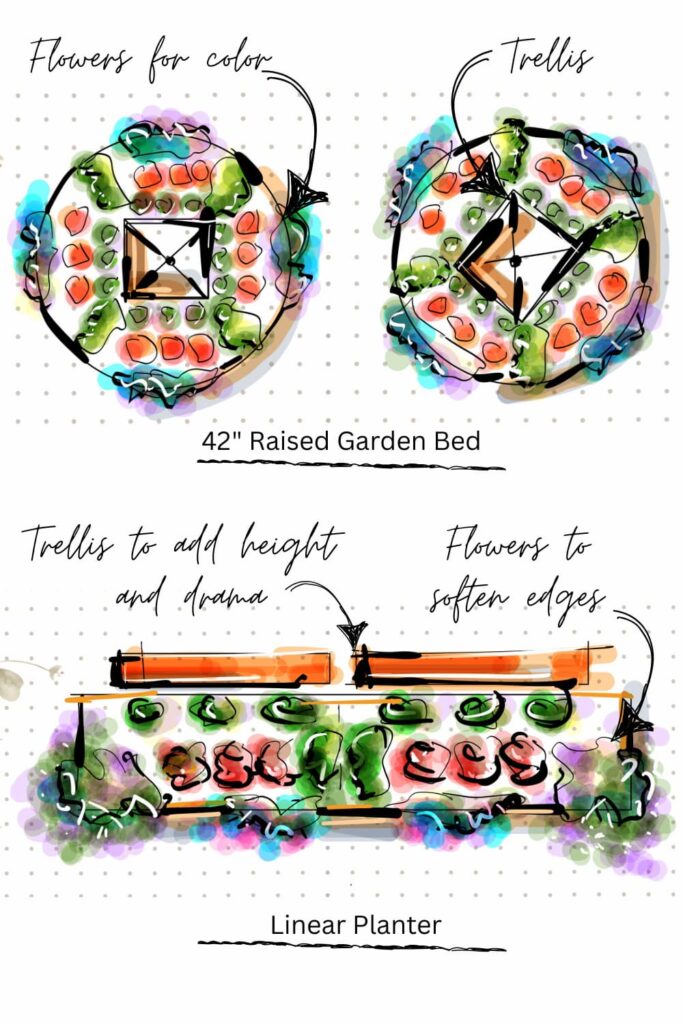
- In a Round Bed
Center: Place a trellis and grow climbing peas in the spring and a beautiful tomato in the summer.
Middle Ring: Add red and green lettuces or herbs like cilantro or parsley, even tricolor sage is stunning. In the summer, scallop squash is a stunning veggie to grow from which you will harvest so many.
Out Edge: Fill in with petunias, alyssum, pansies, or violas to soften and bloom.
- In A Rectangular Raised Planter
Back Row: Climbing plants on a trellis; peas, beans, cucumbers. Look for beans that provide gorgeous flowers, which, many times, those flowers are also edible.
Middle: Shorter leafy greens and compact veggies like peppers. You can add some dwarf snap peas.
Front Row: Trailing flowers or herbs like nasturtiums, super petunias, and alyssum. (Beware that the herbs you select are not going to take over, like oregano and thyme)
- In Containers
Back Row: Compact climbers or upright plants like dinosaur kale that grow very tall and have large leaves.
Around the Center: Leafy greens, such as butternut crunch, merlot lettuce, and some kales that have beautiful, soft edges and are more compact, like the Red Russian kale.
Outer Rim: Railing varieties that spill over the edge and add texture, snapdragons, violas.

A Real-Life Example From My Garden
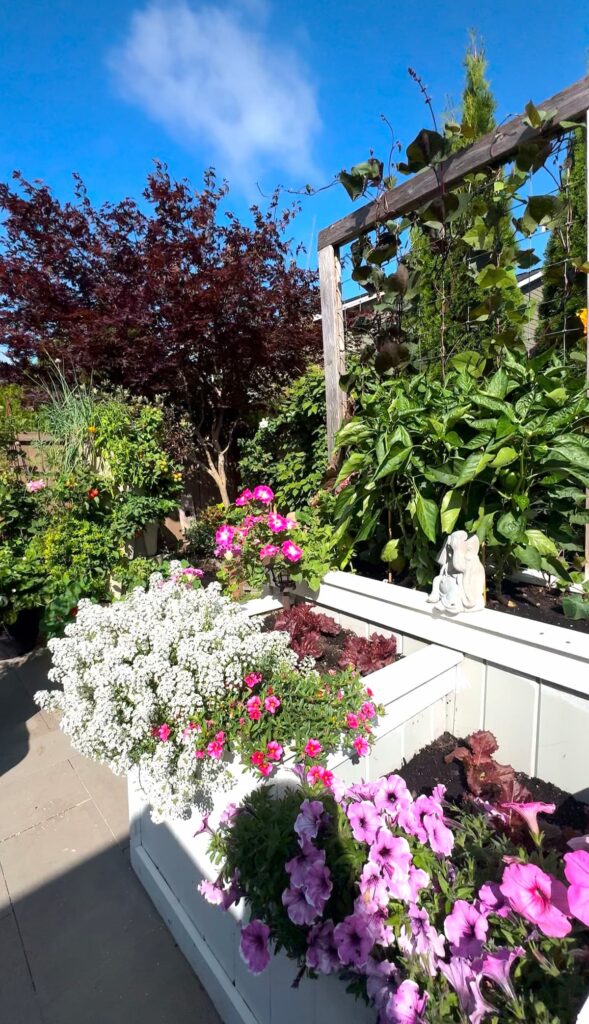
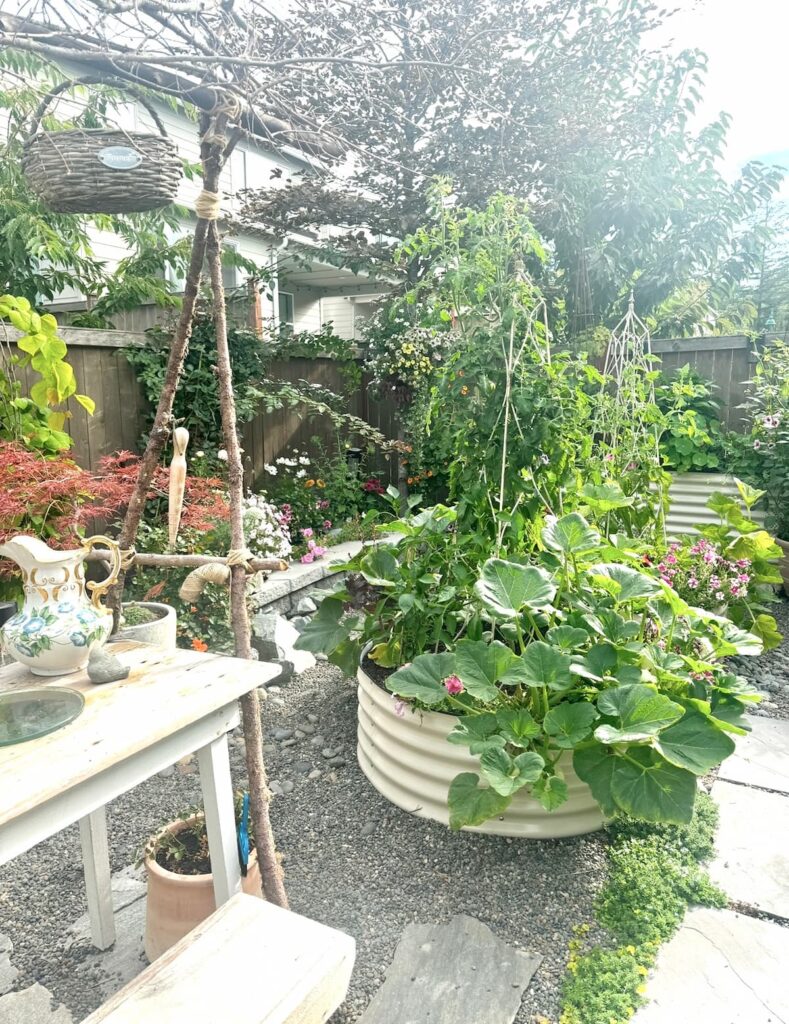
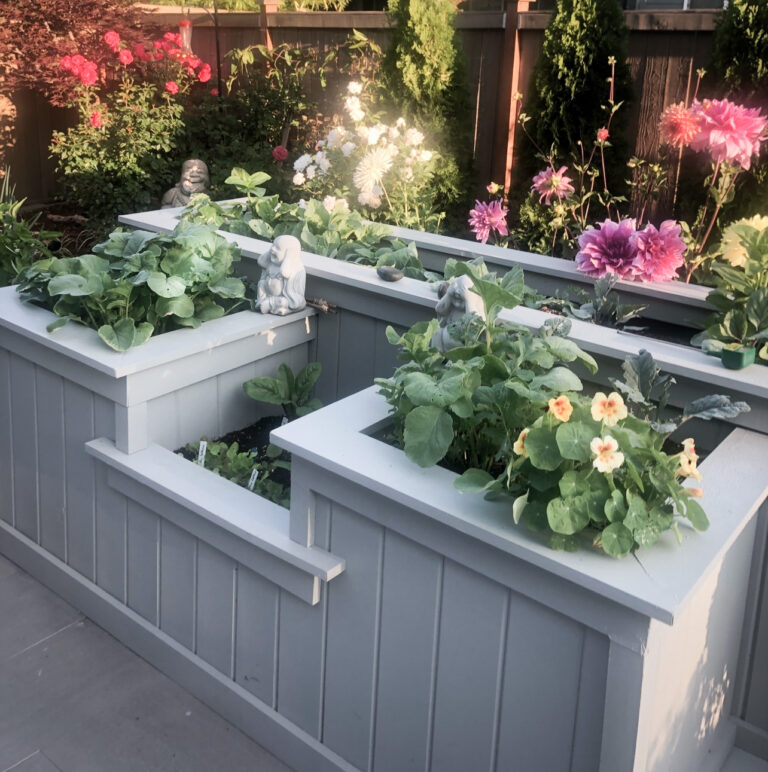
I apply these garden planning layout strategies to my entire garden. In one of my 42″ round metal beds, I placed a square decorative trellis on a diagonal to make it feel dynamic. I tucked in climbing peas, then surrounded them with two kinds of lettuce and dwarf peas. And on the edges? Pansies with the large, dramatic, colorful blooms. Each is a different color, some with ruffles, others smooth and velvety.
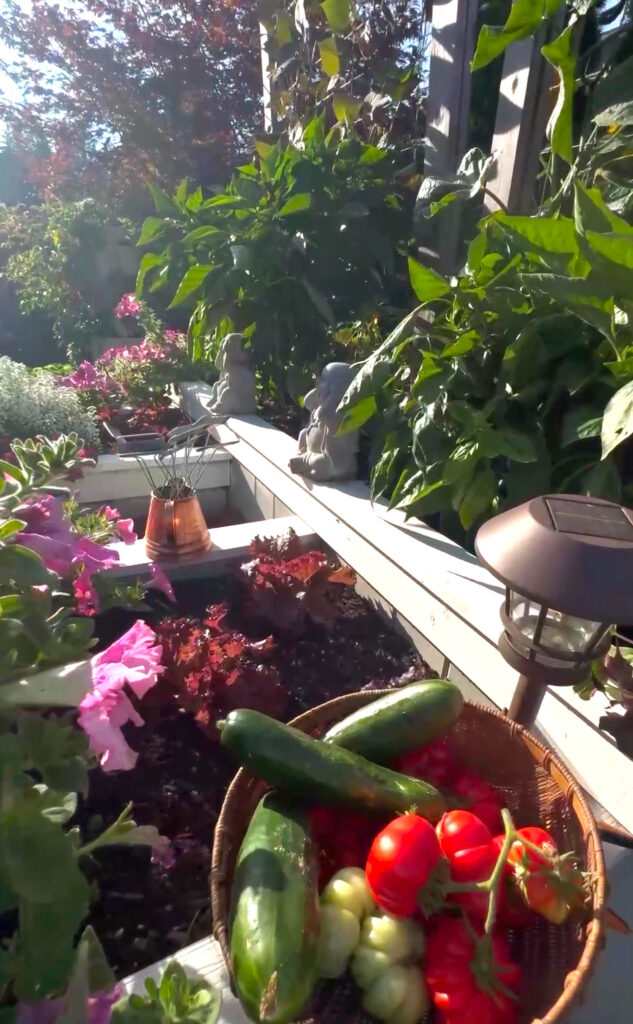
The result? By the time spring was in full swing, that one bed looked like three garden dreams rolled into functional, edible, and so inviting, I often sat next to it with my tea just to admire it.
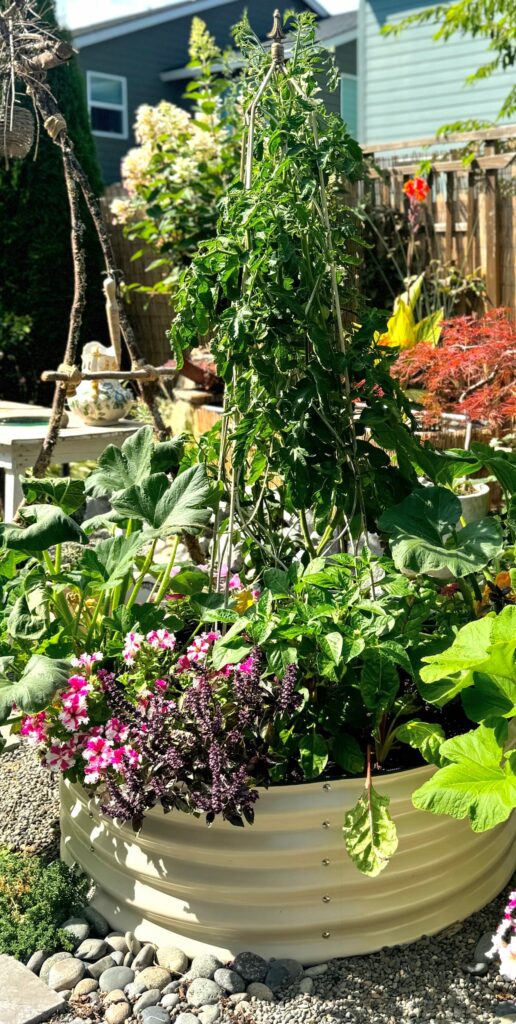
In the summer, I replace pansies with petunias and snap peas with tomatoes. I added some scalloped squash plants and plenty of basil; the purple ones are stunning. I love the purple ball basil; it lasts so long, and it is the most fragrant basil I have ever grown. So delicious!
My Take: Gardening for the Soul (and the Salad Bowl)
This isn’t about breaking the rules for the sake of it. It’s about listening to what your space-and your heart-really needs.
For me, gardening is how I reconnect with myself, especially on the hard days. I started layering and planting this way because it brought me peace. And then I realized it brought abundance, too.
That’s why I share this. Not as a rule to follow, but as an invitation to trust your instincts.
If you see space, grow into it.
You crave beauty, plant what makes you smile.
If you want more harvests, give every plant a role to play.
And if anyone says you’re doing it wrong-just smile and hand them a bouquet of pansies.
Ready to Try it?
Start small. Try a layered layout in a planter or the corner of your bed. Observe, adjust, and make it your own.
Then keep layering from there.
And leave the rule in the house. The yard is for playing!
If you’re looking for more ideas, check out my FREE Mindset Reset Garden Planner. It’s not a template in the traditional sense, but it will help you dream up a space that feeds your life in the ways you need most.
What part of your garden do you dream of filling with beauty this season? I’d love to hear from you below.
Until next time, keep gardening for your mind, body, and soul.
You Cocoon Awaits You,
Stay Creative!
IF YOU ENJOYED THE POST, PLEASE PIN BELOW TO SUPPORT THE BLOG
FREQUENTLY ASKED QUESTIONS
1. How do I layout my garden?
Consider the amount of sunlight each area receives, your soil type, and the mature size of your plants. Sketch a rough plan on paper, grouping plants with similar needs. Think about pathways and access for maintenance.
2. What is the rule of 3 in gardening?
It is about creating visually appealing arrangements by grouping plants in odd numbers(e.g., 3,5, or 7). These numbers tend to look more natural and balanced than even numbers.
3. What is the best way to arrange plants in a garden?
Arrange plants based on their height, color, and the texture or size of the leaves to create the best visual interest.
4. How do I start planning a garden layout for free?
Begin by looking at the space you have available, sunlight exposure, and the soil you have available to know what you need to do to get the best base for success. Use paper and keep a diary of your dreams, needs, and what you think is the perfect garden day. Start sketching a basic layout and researching plants that will do good in your climate. You can join free garden clubs or find a gardening buddy like I have. It is fun, free, and you learn so much from each other.
DON’T LEAVE YET!
Colours of Wellness, Heal your heart from within with color


Good Morning Melba…
I thoroughly enjoy your posts and am going to start my ‘plan’ today. You simplified the process for me…I read so much about growing requirements, spacing, etc. that I worry I’ll do everything wrong and wind up with a hot mess. I love how you build your beds with the trellising and plant placements…once I looked at your drawings and read the article, I feel more ready to jump in…it all made sense. 🙂
Here’s a thought to the general opinion of overcrowding…
You wrote: “Yes, I know some would say I plant too close together. but if I see open soil, I can’t help but want to fill it and it helps keep the weeds away…”
Isn’t that EXACTLY what Mother Nature does..? She quickly fills in bare patches of ground with various plants to protect the exposed earth. Your way gives the option of mindfully deciding which plants to use to protect the exposed areas rather than causing chaos in the form of ‘weeds’ that we are constantly fighting. 🙂
You have no idea how much your message means to me—truly, in the best way possible! It’s such a big moment for me to hear that something I shared helped simplify the process and made it feel less overwhelming for you.
I completely understand that feeling – when I first started gardening, I remember being so concerned about spacing and so many other things. But once I let go, the experience changed for me, and so did the outcome. It all became a more natural process.
And YES! You said it perfectly, Mother Nature never leaves bare soil uncovered. She’s our greatest teacher. Filling the space intentionally with plants that mean so much to me and nourish our souls in such a way that it makes so much sense. It brings so much peace that is difficult to explain unless you have felt it.
Thank you for such a thoughtful and encouraging message. I am cheering you on as you start your plan, and can’t wait to hear how it all unfolds. You’ve got this! Garden hugs!